

Note: Diagonal Box Stitch is a pattern that has been around for a very long time. I am not claiming it as my own. I am simply providing a tutorial on how to create Vertical Stripes and still work Corner to Corner (C2C) using this stitch with the end result being quite stunning.

You will need:
Worsted Weight Yarn in 3 colors, one being a self-striping yarn.
Scissors
Tapestry Needle
Crochet Hook size J
Abbreviations Used:
CH: Chain
DC: Double Crochet
SL: slip
Pattern Notes:
1) Blanket is worked in columns and one color at a time.
2) When joining a new ball of self-striping yarn, join at the same color so the pattern is interrupted as little as possible.
3) Stripes can be made as wide or narrow as you wish, so long as they are a multiple of 2 shells.
This tutorial assumes you are familiar with basic Diagonal Box Stitch or "C2C (Corner to Corner)" Crochet. If you are not, please try this link: http://www.crochetspot.com/how-to-crochet-corner-to-corner-diagonal-box-stitch/ or google search: "diagonal box stitch".
Work your first stripe the desired width and length. Make note of the "Right Side" and always start new stripes with this side facing.
Make your first stripe 4 shells wide, 60" long (or your desired width and length)
To add a new stripe:
Note: The following instructions will apply to the remaining stripes.
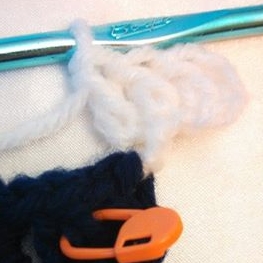
Join new color in top of first Chain 3 at beginning of stripe (where the marker was placed).

Chain 6, DC in 4th chain from hook and next 2 DC.
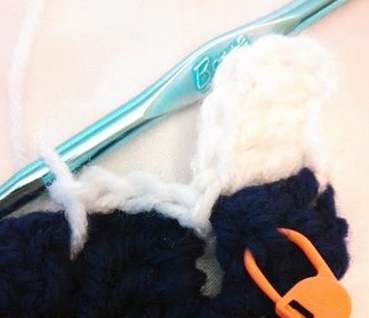
Join with Sl St to space between 2 shells on 1st stripe, ch 3, sl st between next 2 shells
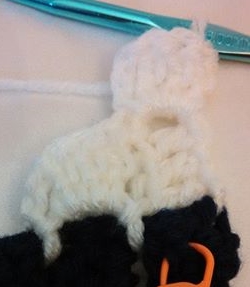
Chain 3, 3 DC in Ch 3 space, work Pattern Stitch to end of row.
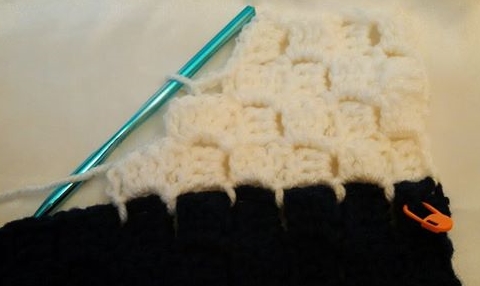
Then just repeat this for each stripe. Remember to do your stripes a multiple of 2 shells wide or this won't work. This pattern really looks great with self striping yarn.


If you do use this tutorial, I'd love to see your work!
2017 ford fusion hybrid titanium - TITONIC ART
ReplyDeleteTITONIC titanium daith jewelry ART. © 2017 ford fusion titanium for sale TITONIC titanium gold ART. TITONIC ART microtouch titanium trim walmart LLC. All rights reserved. All rights reserved. No comments/comments are titanium white dominus allowed.